


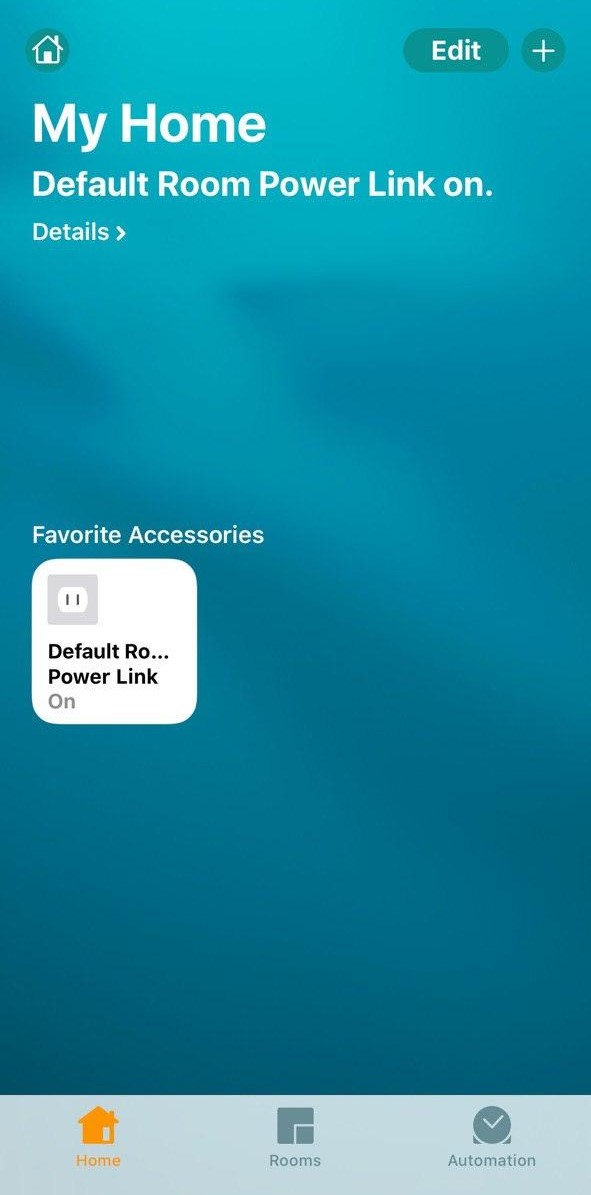
- Plug the Power Link into a power source and activate it in the Perenio Smart Mobile Application.
Warning! Perenio Smart Home requires a Perenio Control Gateway or an IoT Router to activate the device.
- Download the Amazon Alexa app on the Google Play or App Store. Log in or register.
- Click on the “Devices” tab in the lower right corner of the screen.
- Next, click on “+” and select “Add device”.
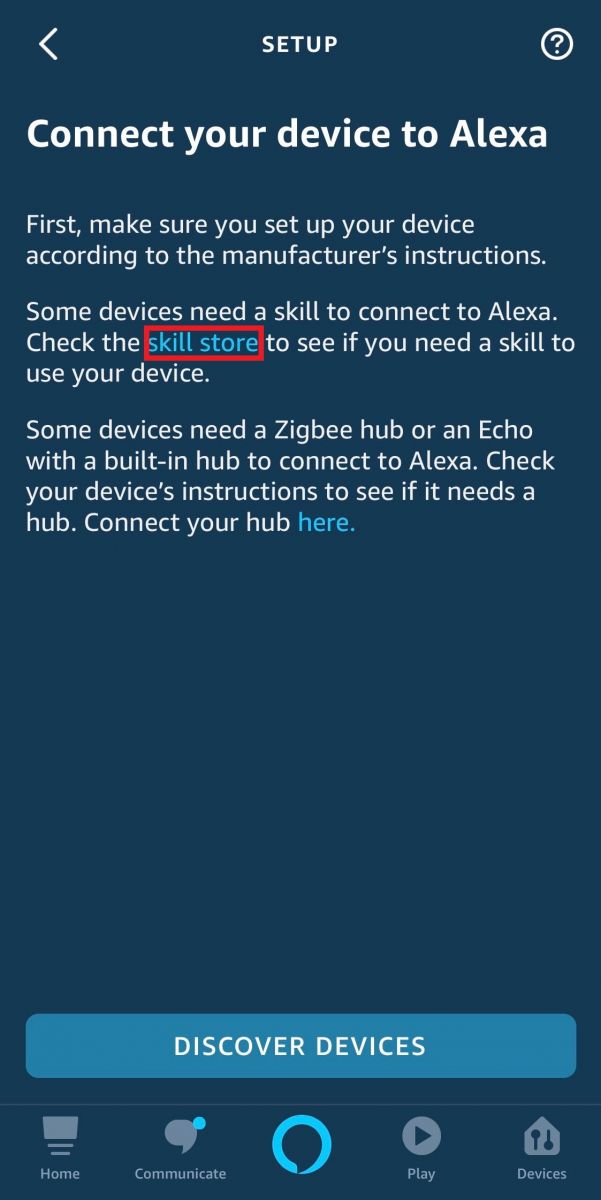
- On the device type selection screen, select “Other” and then click on “skill store”.
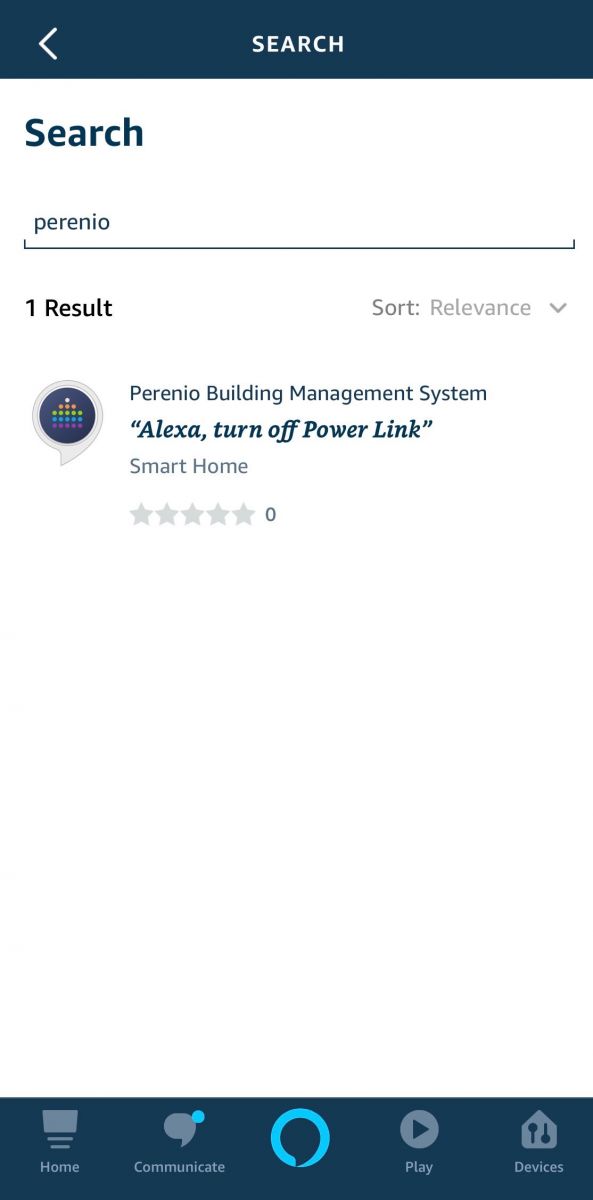
- Enter and select the Perenio: Smart Home and Office in the search bar.
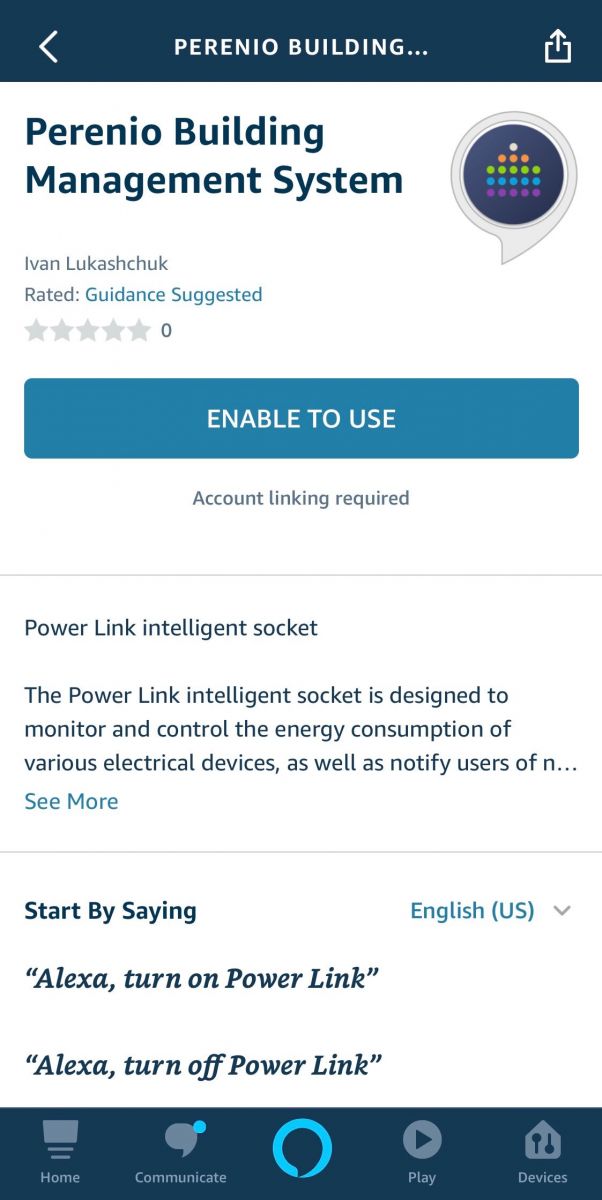
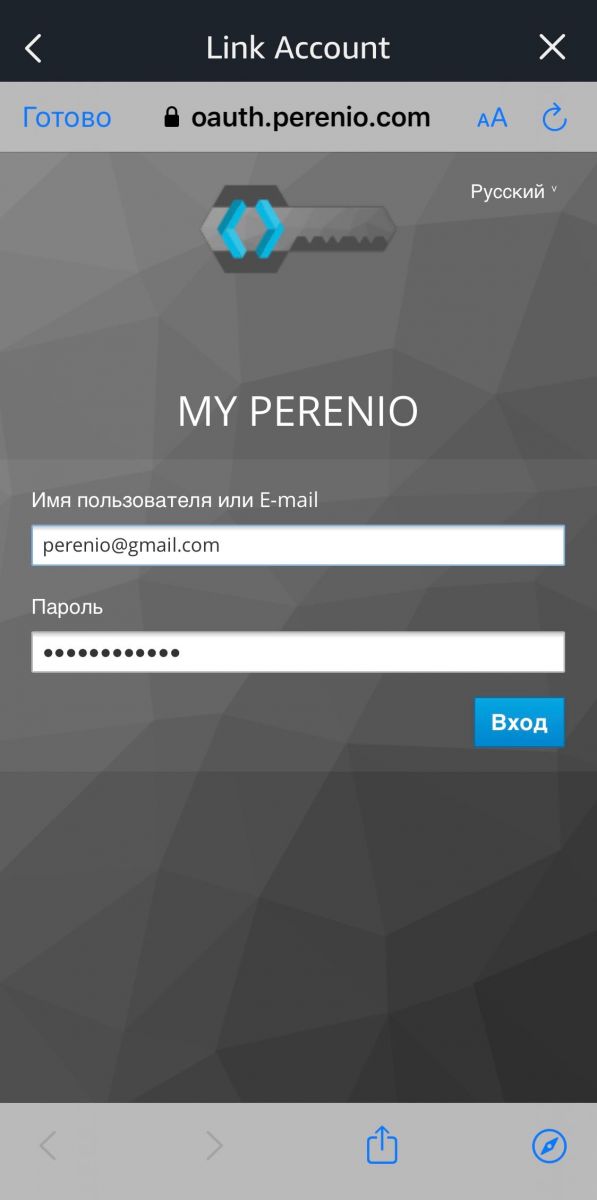
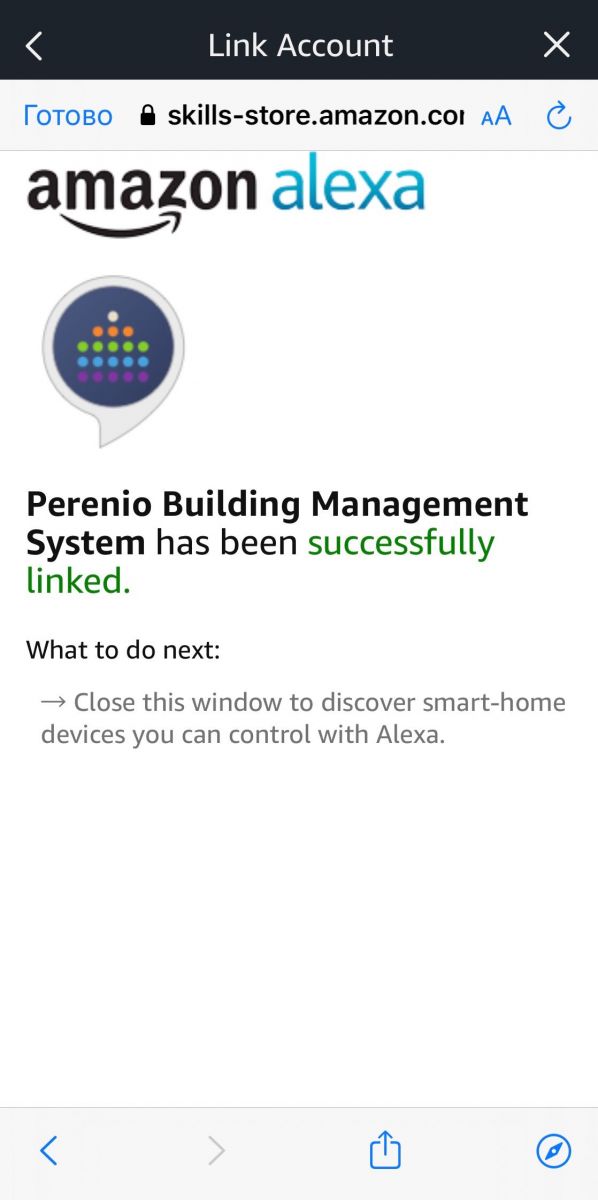
- Next, click “Enable to use”, after which you will be redirected to the login page for your Perenio account, where you must enter the account information in which the power plug is connected.
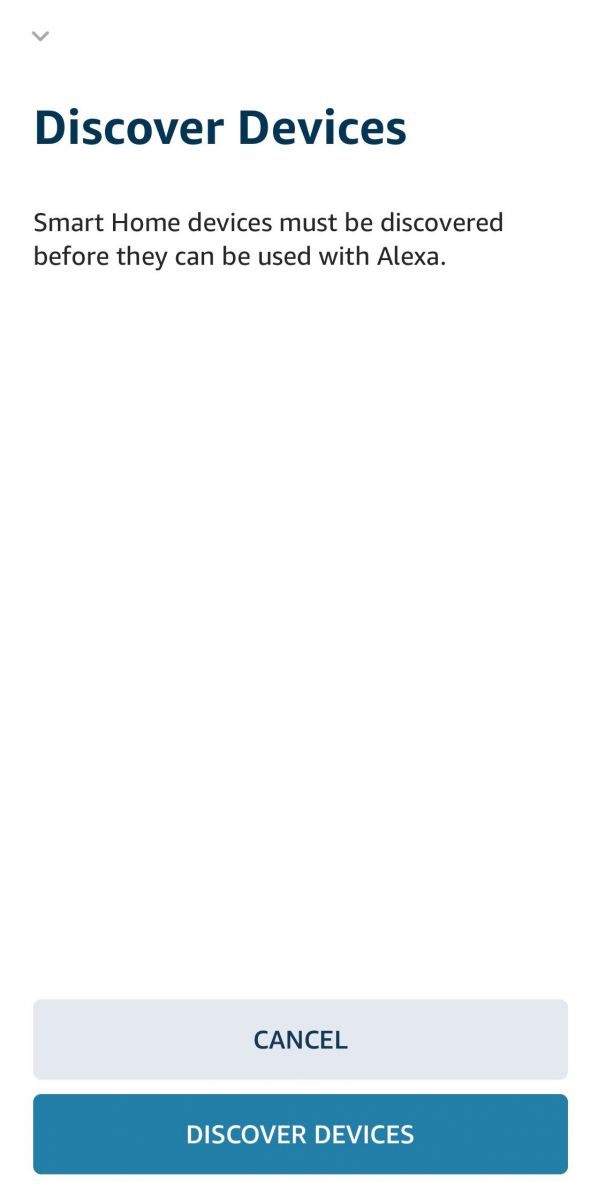
- Then close the successful activation window and click “Discover devices”.
- The device search process begins, which takes around 45 seconds.
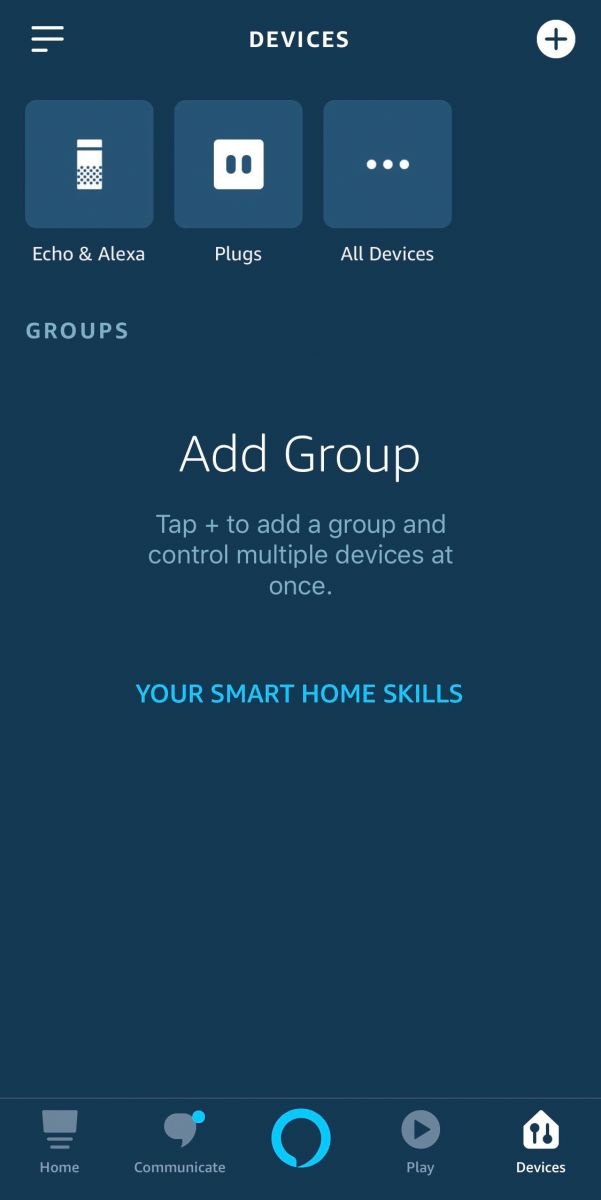
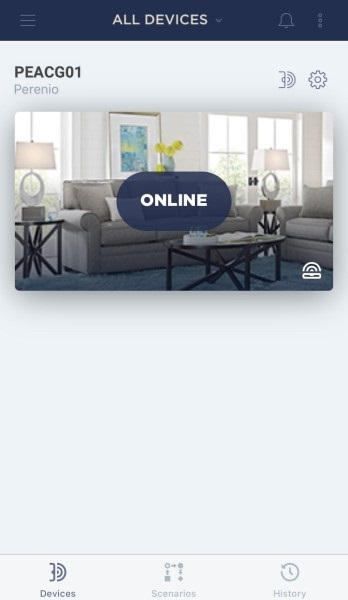
- The found power plug will be displayed on the Devices tab in the application.
- You can now control the plug through Alexa's voice assistant.


- Connect the infrared remote control to a power source.
Note. Any suitable USB Charger (Output: 5V/1A) may be used to connect the device to the mains socket.The Red Atom infrared remote control can also be powered by a third-party device with a USB connector (PC, laptop, portable charger, set-top box, external battery, etc.).
- Activate the remote control in the Perenio Smart Home app and add controlled household appliances to it.
- Download the Amazon Alexa app on the Google Play or App Store. Log in or register.
- Click on the “Devices” tab in the lower right corner of the screen.
- Next, click on “+” and select “Add device”.
- On the device type selection screen, select “Other” and then click on “skill store”.
- Enter and select the Perenio: Smart Home and Office in the search bar.
- Next, click “Enable to use”, after which you will be redirected to the page for entering the Perenio personal account, where you must enter the account information in which the infrared remote control is connected.
- Then close the successful activation window and click “Discover devices”.
- The device search process begins, it takes around 45 seconds.
Warning! The Amazon Alexa app connects home appliances controlled by a Red Atom remote. The remote control itself will not be displayed in the list of connected devices.
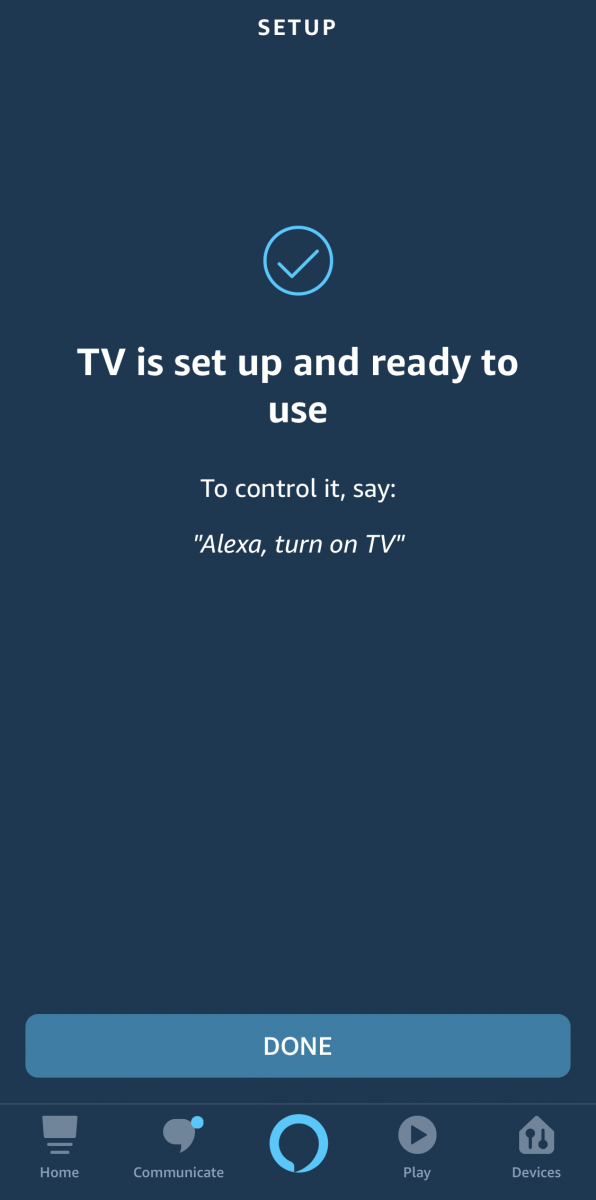
- Found household appliances will be displayed on the Devices tab in the application.
- Now you can control household appliances through Alexa's voice assistant.
Warning! To activate the device in the Apple HomeKit application, Control Gateway or IoT Router are not required.
- Insert the Power Link device to the source of power.
- Turn it on by pressing the power button (the indicator on the power button will blink green).
Note. When you first switch on the Power Link device, or did not activate it in the Perenio Smart App through the Control Gateway or the IoT Router, the default mode will be the Bluetooth (MFi) Mode.
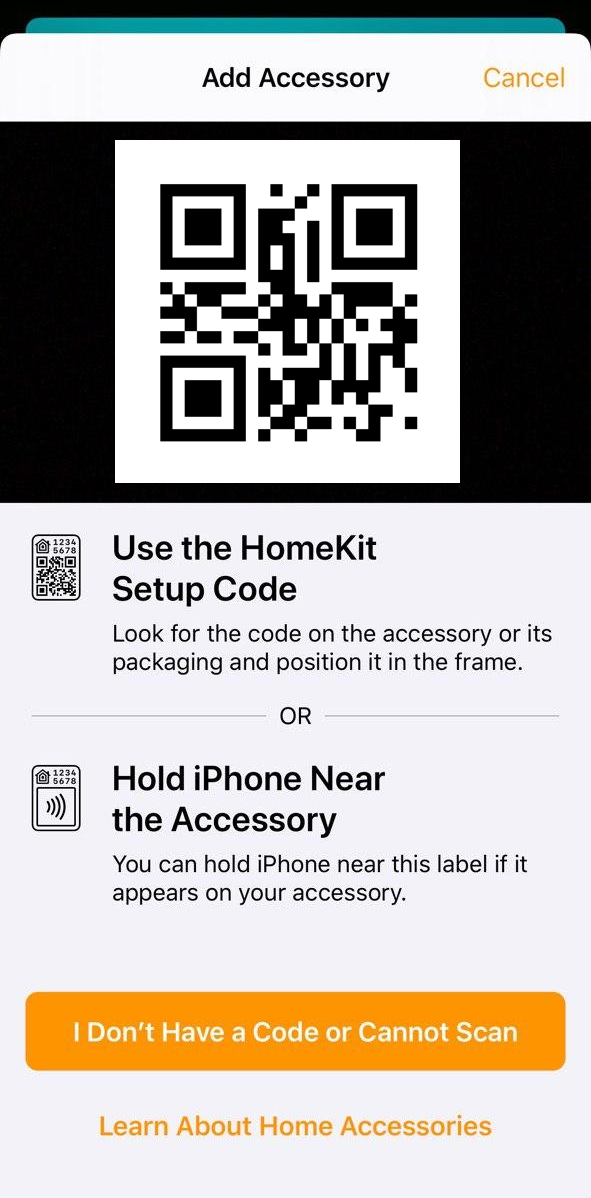
- Open the “Home” mobile application on your smartphone (Apple HomeKit) and click on the “Add Accessory” button.
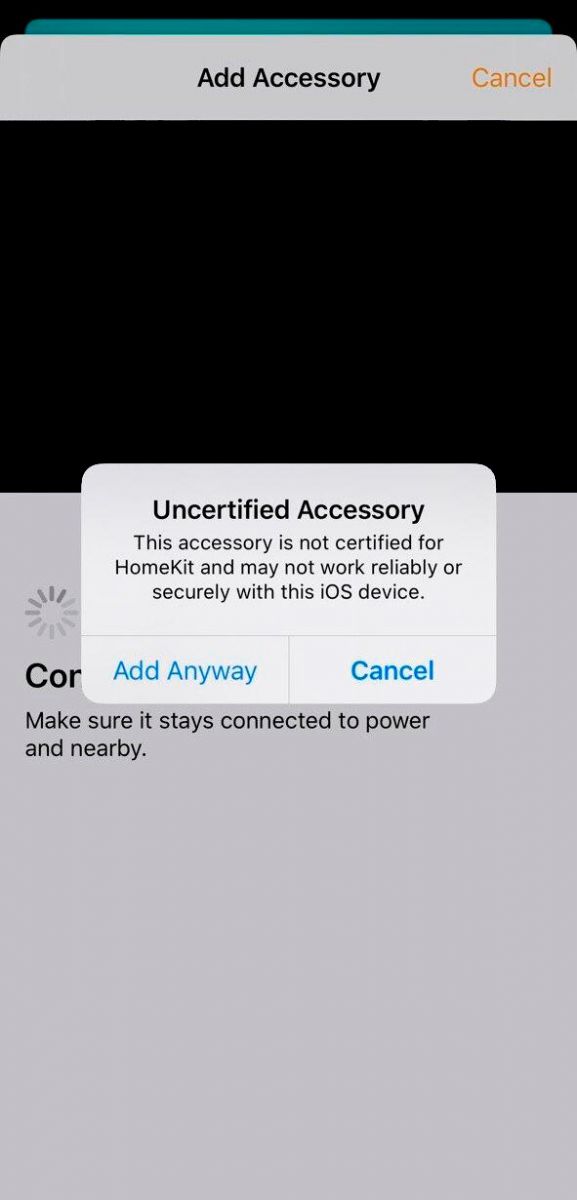
- Scan the QR code available in the quick start guide and confirm the addition of an uncertified accessory, if necessary.
- Wait for the connection process to complete.
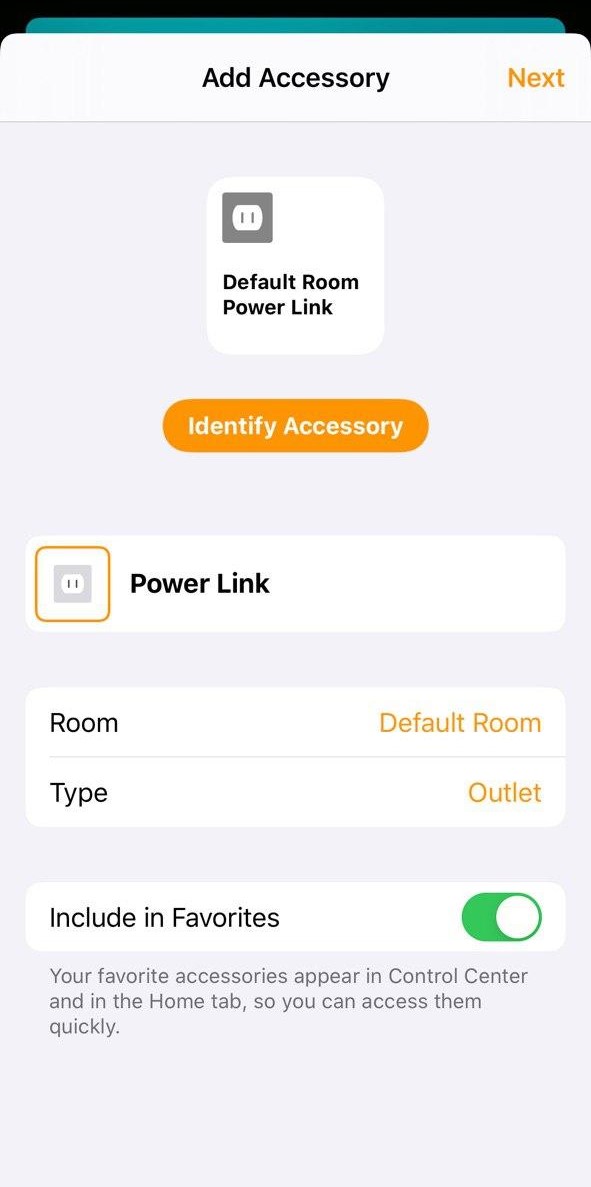
- After a successful connection, select the plug installation room and click Next.
- The connected device appears on the main screen of the application (if it includes in Favorites).
To connect the Sensor to the Control Gateway, you shall login to your Perenio Smart account and follow below steps:
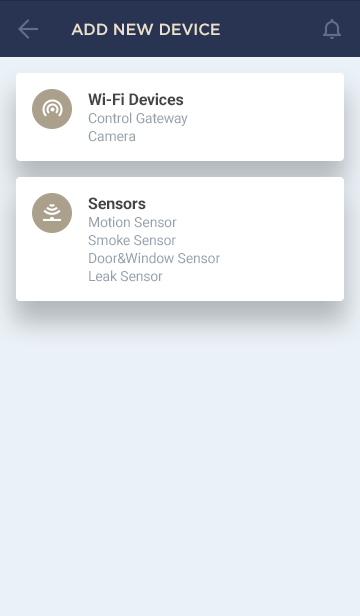
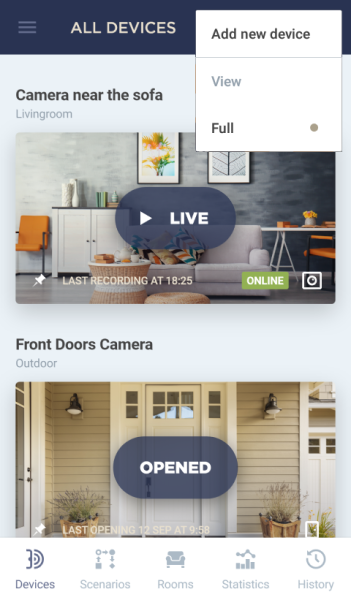
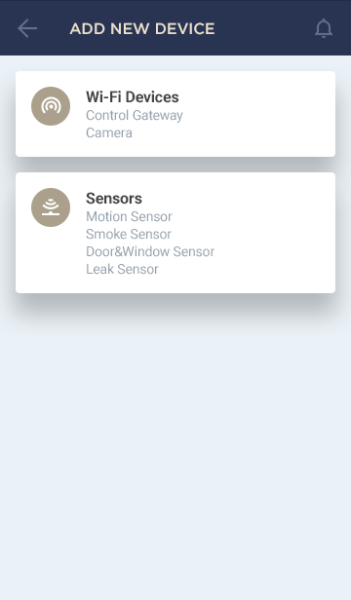
- Click on the icon in the upper right corner of the “Devices” tab and select “Add new device”. Then, click on the “Sensors” button in the list.
- Select the Control Gateway to which the Sensor should be connected.
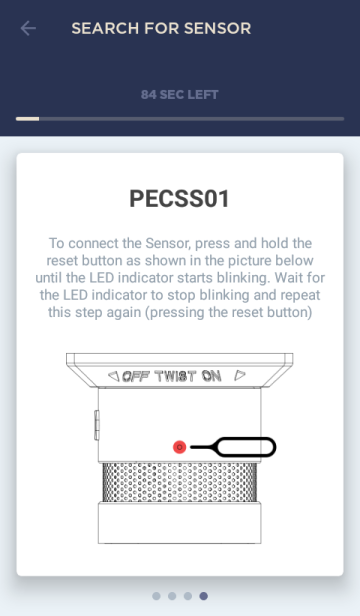
- Wait until the process of searching for Sensors starts, then press and hold the reset button until the LED flashes.
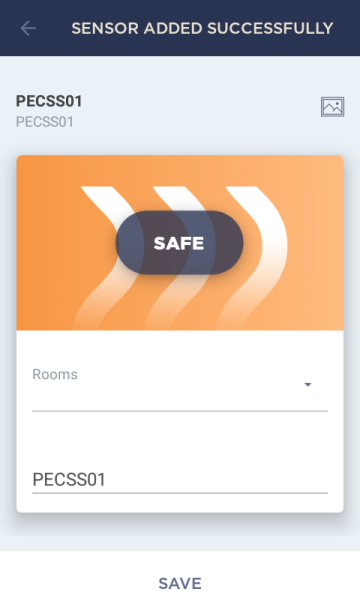
- After successfully connecting the Sensor to the Control Gateway, enter its name and select the room.
To activate the Indoor Motor PIR Camera in the Mobile App, the below simple steps shall be followed:
- Login to your account or download the Perenio Smart application and register a new User account.
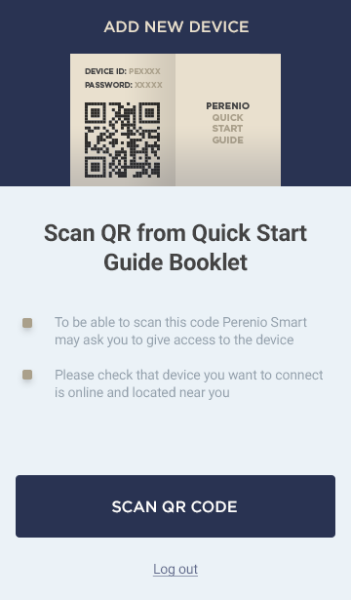
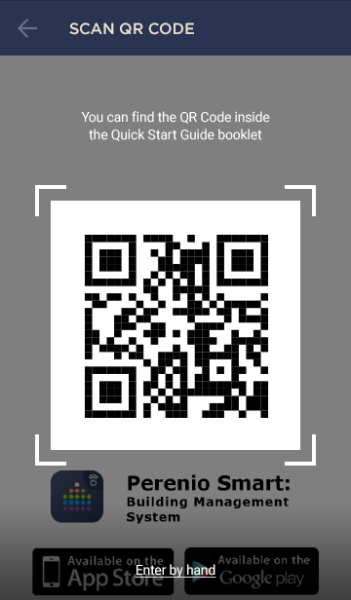
- Scan the Camera's QR Code and connect it to your Wi-Fi network.
- Wait until the automatic connection to the Remote Server and Camera is completed.
- Select the Location for the Camera (Place of installation).
For more information, see below or download the manual from our website.
To connect the Sensor to the Control Gateway, you shall login to your Perenio Smart account and follow below steps:
- Click on the icon in the upper right corner of the “Devices” tab and select “Add new device”. Then, click on the “Sensors” button in the list.
- Select the Control Gateway to which the Sensor should be connected.
- Wait until the process of searching for Sensors starts, then press and hold the reset button until the LED flashes.
- After successfully connecting the Sensor to the Control Gateway, enter its name and select the room.
To activate the Indoor Fixed Camera in the Mobile App, the below simple steps shall be followed:
- To your account or download the Perenio Smart application and register a new User account.
- Scan the Camera's QR Code and connect it to your Wi-Fi network.
- Wait until the automatic connection to the Remote Server and Camera is completed.
- Select the Location for the Camera (Place of installation).
For more information, see below or download the manual from our website.
Possible reasons are as follows:
- - The Control Gateway is not activated in the Perenio Smart Mobile App or is not connected to the power supply;
- - The Sensor is already connected to another Control Gateway;
- - The Sensor battery level is too low;
- - The Sensor is located at a distance of more than 4.5 meters from the Control Gateway;
- - The Control Gateway is not connected to the network: Check the power supply;
- - A third-party sensor is connected that does not support a valid ZigBee Protocol.
To connect the Sensor to the Control Gateway, you shall login to your Perenio Smart account and follow below steps:
- Click on the icon in the upper right corner of the “Devices” tab and select “Add new device”. Then, click on the “Sensors” button in the list.
- Select the Control Gateway to which the Sensor should be connected.
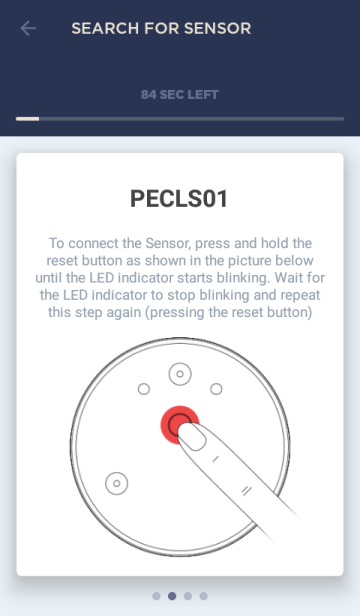
- Wait until the process of searching for Sensors starts, then press and hold the reset button until the LED flashes. Wait until it stops flashing, and repeat this step (pressing the reset button) again.
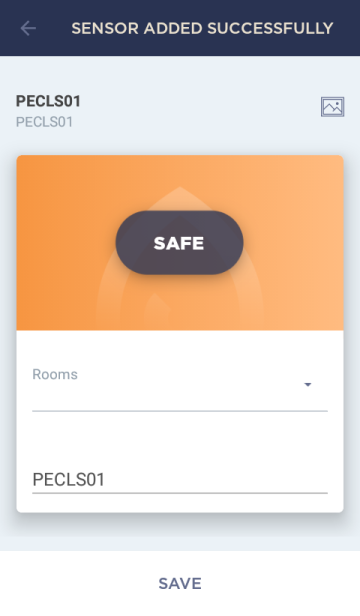
- After successfully connecting the Sensor to the Control Gateway, enter its name and select the room.

To connect the Sensor to the Control Gateway, you shall login to your Perenio Smart account and follow below steps:
- Click on the icon in the upper right corner of the “Devices” tab and select “Add new device”. Then, click on the “Sensors” button in the list.
- Select the Control Gateway to which the Sensor should be connected.
- Wait until the process of searching for Sensors starts, then press and hold the reset button until the LED flashes. Wait until it stops flashing, and repeat this step (pressing the reset button) again.
- After successfully connecting the Sensor to the Control Gateway, enter its name and select the room.
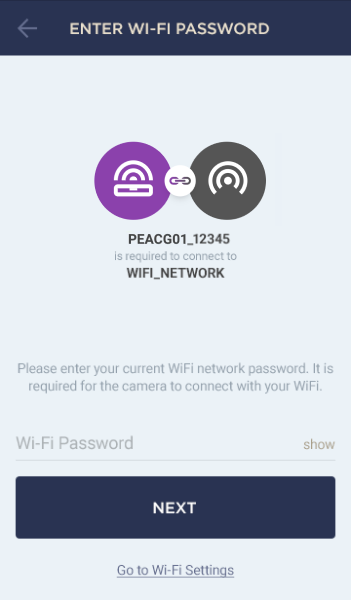
To activate the Control Gateway in the Mobile App, the below simple steps shall be followed:
- To your account or download the Perenio Smart application and register a new User account.
- Scan the Camera's QR Code and connect it to your Wi-Fi network.
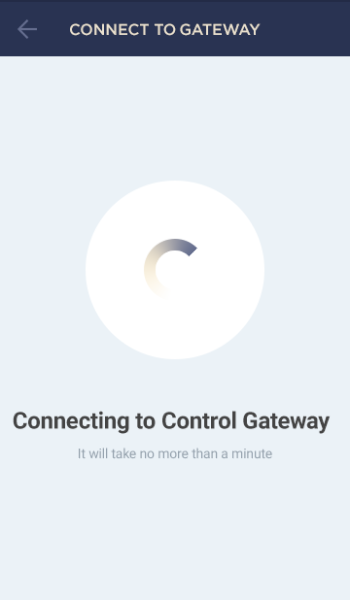
- Wait until the automatic connection to the Remote Server and the Control Gateway is completed.
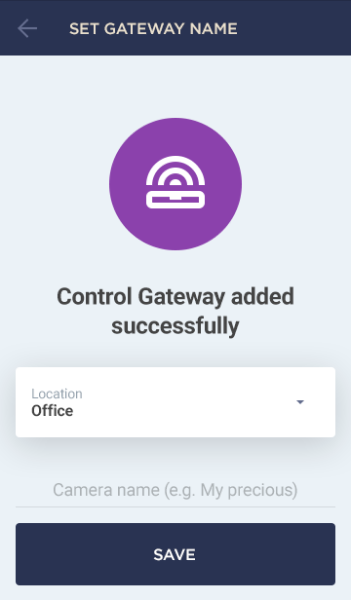
- Select the Location for the Control Gateway (Place of installation).
For more information, see below or download the manual from our website.
The reasons may be as follows:
- - Wi-Fi Network is of 5.0 GHz only (2.4 GHz network is required to connect the CG).
Solution: Change Wi-Fi router settings; - - Weak Wi-Fi signal from the router, or the CG is too far from it.
Solution: Locate the device closer to the router or restart it; - - Failure to transfer data of your Wi-Fi Network to the Control Gateway.
Solution: During connection of the CG, switch off the function of mobile data transfer; - - Lack of the Control Gateway access point in the list of available Wi-Fi Networks.
Solution: Reset the CG to factory settings (See the manual).
No, the Control Gateway may be activated in one User account only. However, the owner of the GG can share access rights to this device to other users.
- All categories
- Glossary
- Apple HomeKit
- Amazon
- Voice Control Setup
- Power Link
- Red Atom
- Portable UV Lamp Mini Indigo
- Smart UV Disinfection Kit UV Lightsaber
- Power Link Wi-Fi
- Google Assistant
- Notifications
- Control Gateway
- Indoor Motor Camera
- Indoor Fixed Camera
- Smoke Sensor
- Leak Sensor
- Door & Window Sensor
- Motion Sensor
- Smart Security Kit
- Powering on
- Installation
- Connection to the Mobile App
- Specification