Yes, you can check the status of the sensor in the Perenio Smart App. If the sensor is connected and working, then in the APP you will see the ONLINE status. If the battery of the sensor is discharged or for some reasons there is no connection, the application will display the status that the sensor is OFFLINE.
To connect the Sensor to the Control Gateway, you shall login to your Perenio Smart account and follow below steps:
- Click on the icon in the upper right corner of the “Devices” tab and select “Add new device”. Then, click on the “Sensors” button in the list.
- Select the Control Gateway to which the Sensor should be connected.
- Wait until the process of searching for Sensors starts, then press and hold the reset button until the LED flashes.
- After successfully connecting the Sensor to the Control Gateway, enter its name and select the room.
Yes, you can disconnect the Sensor from the Control Gateway manually or in the Sensor settings in the application. In the first case, press and hold the reset button on the sensor until the LED flashes (It generally takes up to 5 seconds).
To check that the Sensor was disconnected, you should update the list in the “Devices” tab (Pull the screen down until the progress icon appears and the data is updated). If the Sensor is disconnected, it will disappear from the list of available devices.
It depends on the expected result. Generally, the Motion Sensor may not trigger if the door is opened, since it is sensitive to heat emission. In this case, the Door & Window Sensor will be more accurate if the goal is to identify the opening of the door, window, etc.
Yes, of course. There are several options for correct relocation of the device, namely:
1. Install the Sensor in another Room (The Sensor will remain connected to the same Control Gateway) as follows:
- Move the Sensor to another room and make sure it is at an allowable distance from the Control Gateway;
- Install the Sensor in a new room;
- Change the Room in Sensor settings in the User Account.
2. Install the Sensor in another Room/Location (The Sensor will be connected to another Control Gateway):
- Sign in to the Perenio Smart app and select the Location where the Sensor is activated;
- In the ‘Devices’ tab, select the required Sensor from the list and click on the Settings icon;
- In the pop-up window, choose ‘Disconnect device’;
- Move the Sensor to another room and make sure it is at an allowable distance from the Control Gateway;
- Install the Sensor in a new room;
- Reconnect the Sensor to the Control Gateway through the Perenio Smart application.
The device is activated when Sensor parts become more than 2-3 cm apart from each other. There is no siren, but a corresponding notification is sent to the Perenio® Control Gateway in the case of triggering.
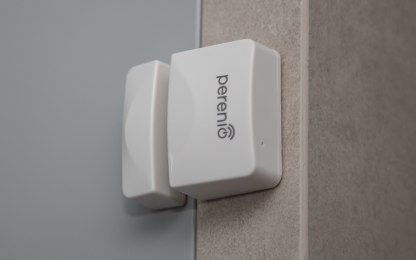
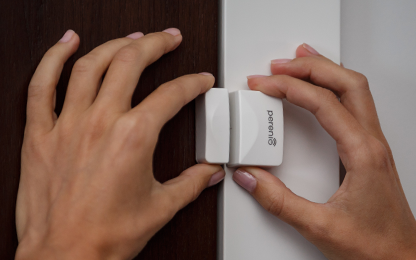
Both parts of the Door & Window Sensor shall be installed at the same height on the edge of the door/window frame so that in the closed state the Magnet is within 20 mm from the Sensor. It can be sticked on the 3M tape or screwed. For details on installation options, see the manual downloadable from our website.


To switch on the Sensor, it is necessary to remove the back panel and pull out the battery insulating strip. After that, the LED under its casing will blink.
The scope of supply includes the Sensor (battery incl.), the reset pin, the screw with a dowel, the 3M Tape, the 3M Sponge, the QSG and the Warranty Card.
The Door & Window Sensor cannot operate autonomously, which means it is not capable to giving away a sound signal upon the door or window opening.
The Door & Window Sensor can operate on a single battery for up to 24 months.
Possible reasons are as follows:
- - The Control Gateway is not activated in the Perenio Smart Mobile App or is not connected to the power supply;
- - The Sensor is already connected to another Control Gateway;
- - The Sensor battery level is too low;
- - The Sensor is located at a distance of more than 4.5 meters from the Control Gateway;
- - The Control Gateway is not connected to the network: Check the power supply;
- - A third-party sensor is connected that does not support a valid ZigBee Protocol.
It is very likely that your Location is in the Disarmed Mode. In this case, notifications on the Door&Window Sensor actuation are displayed in the History tab only.
Yes, of course. There are several options for correct relocation of the device, namely:
1. Install the Sensor in another Room (The Sensor will remain connected to the same Control Gateway) as follows:
- Move the Sensor to another room and make sure it is at an allowable distance from the Control Gateway;
- Install the Sensor in a new room;
- Change the Room in Sensor settings in the User Account.
2. Install the Sensor in another Room/Location (The Sensor will be connected to another Control Gateway):
- Sign in to the Perenio Smart app and select the Location where the Sensor is activated;
- In the ‘Devices’ tab, select the required Sensor from the list and click on the Settings icon;
- In the pop-up window, choose ‘Disconnect device’;
- Move the Sensor to another room and make sure it is at an allowable distance from the Control Gateway;
- Install the Sensor in a new room;
- Reconnect the Sensor to the Control Gateway through the Perenio Smart application.
- All categories
- Glossary
- Apple HomeKit
- Amazon
- Voice Control Setup
- Power Link
- Red Atom
- Portable UV Lamp Mini Indigo
- Smart UV Disinfection Kit UV Lightsaber
- Power Link Wi-Fi
- Google Assistant
- Notifications
- Control Gateway
- Indoor Motor Camera
- Indoor Fixed Camera
- Smoke Sensor
- Leak Sensor
- Door & Window Sensor
- Motion Sensor
- Smart Security Kit
- Powering on
- Installation
- Connection to the Mobile App
- Specification


